
Thank you for purchasing a podcast production. Get ready to STAND OUT from the crowd!
We are very excited to be working with you on a podcast!.
Your episode will be available on Apple Podcasts, Spotify, Google Podcasts, and virtually anywhere you get your podcasts. Video versions will be available on YouTube.Watch Mike’s Virtual Meeting Best Practice GuideBefore we get to the podcast , we ask that you take the time to read through the following instructions carefully. This will help things to not only run smoothly on the day, but also to help you sound and look your best. Just remember that we are here to help, so if you have any questions or have any issues, please contact us right away so that we help you find a solution. You can always call Mike at +1 909-957-6877 with any questions.Recording Tips:1. DRESS COMFORTABLY FOR THE OCCASIONWear something that is appropriate for your audience and makes you feel comfortable. An MIT study of 6.9 million video viewing sessions in four TED courses showed that educational video content is more engaging when it combines the personal feel of an instructor speaking directly to the camera along with instructional slides. The good news here is that you only need your top half in the recording, so wearing pants in your next video is completely optional!Of course, the part of you that will be on camera should maintain a professional appearance. Choose a solid-colored dress shirt or blazer, and avoid fabrics with small or distracting patterns that may draw attention away from what you are saying. If you are replacing your background with a green-screen, avoid wearing anything green or you too may disappear! We recommend using virtual backgrounds only if you have a well lighted green screen.2. FLATTER YOURSELF WITH YUOUR WEBCAM PLACEMENTSome camera angles can exaggerate your facial features and distort your appearance. Video is always a bigger challenge if you simply don’t like the way you look in the final product. Fortunately, simply placing your webcam properly can go a long way to achieving the look you want. Whether you are using a USB webcam or the built-in webcam on your laptop, make sure that the camera lens sits at or above eye level, no higher than your hairline. Once your webcam is in place, remember not to sit too close to the camera. In a recent Zogby Analytics survey, 15% of respondents were most turned off by someone sitting too close to the camera on a video call (hearing people eat was only slightly less off-putting). Position your webcam far enough away to capture your shoulders and your entire face with some room to spare.3. USE SOFT LIGHTING FROM THE FRONT
Your ideal webcam setup may look something like thisAll cameras capture better-looking video when there is a good light source, and webcams are no exception. When selecting a place to record, avoid locations with low light or too much backlighting (windows in the background are often a challenge for webcams). Poor lighting may leave your video looking washed out, or worse, may leave you looking like a shadowy figure. Ideally, you want to light yourself from the front with soft, indirect light, and minimize other lighting in the room, particularly from windows or light sources behind you. A ring light is a very effective and affordable solution. Or you can use lights you may already have at home! Place a light with a lampshade in front of you and behind your webcam, or try this DIY studio lighting hack.4. LOOK BEHIND YOU!Even though you’ve made yourself the center of attention in your webcam video, you still need to be cognizant of what’s behind you. Your audience will notice everything and it can distract their attention from your presentation. Try to keep the background simple by avoiding anything that looks busy or cluttered, and again, beware of windows that let in natural light or that might reflect your computer screen. Simply choosing a plain wall as your backdrop is often best.5. CONNECT WITH YOUR AUDIENCE: MAKE EYE CONTACT AND SMILEEye contact is everything when it comes to public speaking, and it’s no different when it comes to video. While it’s perfectly fine to peek down at your presentation materials from time to time, you want to remember to look at your webcam lens and smile as you make your presentation. And don’t forget to blink!Of course, it can be very tempting to watch yourself if your recording software shows your video feed in the corner. Doing so, however, will break your eye contact with your camera (and your viewer). 6. USE A USB MICROPHONE FOR BETTER SOUND QUALITYSounds matters more than you might think — people can watch an instructional recording with good audio and poor video and still understand what was being shared, but a similar recording with great video and poor audio won’t be possible to comprehend. Most people focus so much on the picture when they are recording video that they forget how important it is to have quality audio too. If you intend to use the standard microphone that comes in most laptops or that may be built into your webcam, be sure to create a test recording to make sure you like the way it captures sound. We recommend using a USB microphone that will better minimize background noise. A USB condenser microphone can be purchased for between $20 and $50.Be sure also to do what you can to minimize other sounds in the room. Turn off any machines or fans that may create excess white noise. And if noise from outside the room is an issue, you can place a sign on your door that lets people know a recording is in progress.7. WEAR A HEADSET TO AVOID AUDIO FEEDBACK. Normal cell phone-style headphones will work well.8. DO A TEST VIDEO & PRACTICE WITH YOUR WEBCAM SETUPEspecially if you’re recording in a new location, or with new equipment, it’s always a good idea to record a test video or two — not only to make sure your setup is giving you the look and sound quality you want, but also to practice presenting in front of a video camera. While you may be perfectly comfortable presenting in front of a classroom, you may feel different the first time you record yourself teaching on video. If you’re still feeling your nerves, know that it’s also fine to prepare a script. You may even find a teleprompter helps — many tablets and smartphones even have teleprompter apps available. And if you’re used to presenting to a live audience, you can also consider having someone sit behind your webcam for your first few recordings, so that you’ll be presenting to a real person.This episode will be recorded (not live). So, if mistakes are made, no worries. we have the power of the edit button ;-)9. COMPUTER AND INTERNET REQUIREMENTSTo join an interview, we recommend a Mac or Windows PC running Safari or Chrome, and at least a 5 Mbps internet connection.If possible, avoid a WiFi connection as their bandwidth tends to be unstable. If possible, ensure your computer is connected to the internet via Ethernet. Guests can also join using most common internet browsers. If your browser hasn't been updated lately, it is recommended to conduct a browser update to ensure maximum compatibility. Guests do not need the Ecamm Live app or an Ecamm Live subscription.Wearing headphones is not required, but typically results in better audio quality.Guest screensharing requires a Mac or PC running Google Chrome.Podcast Formats:
We produce both audio-only and video podcasts. Even if your podcast is audio-only, we still use a video recording platform to capture high definition audio. We will be using Ecamm Live to record both audio and video. Here are the instructions for logging into Ecamm Live as a guest:Copy the link emailed to you prior to the recording date and paste it into your browser. Here is the screen you will see:
Grant access to your microphone and camera.
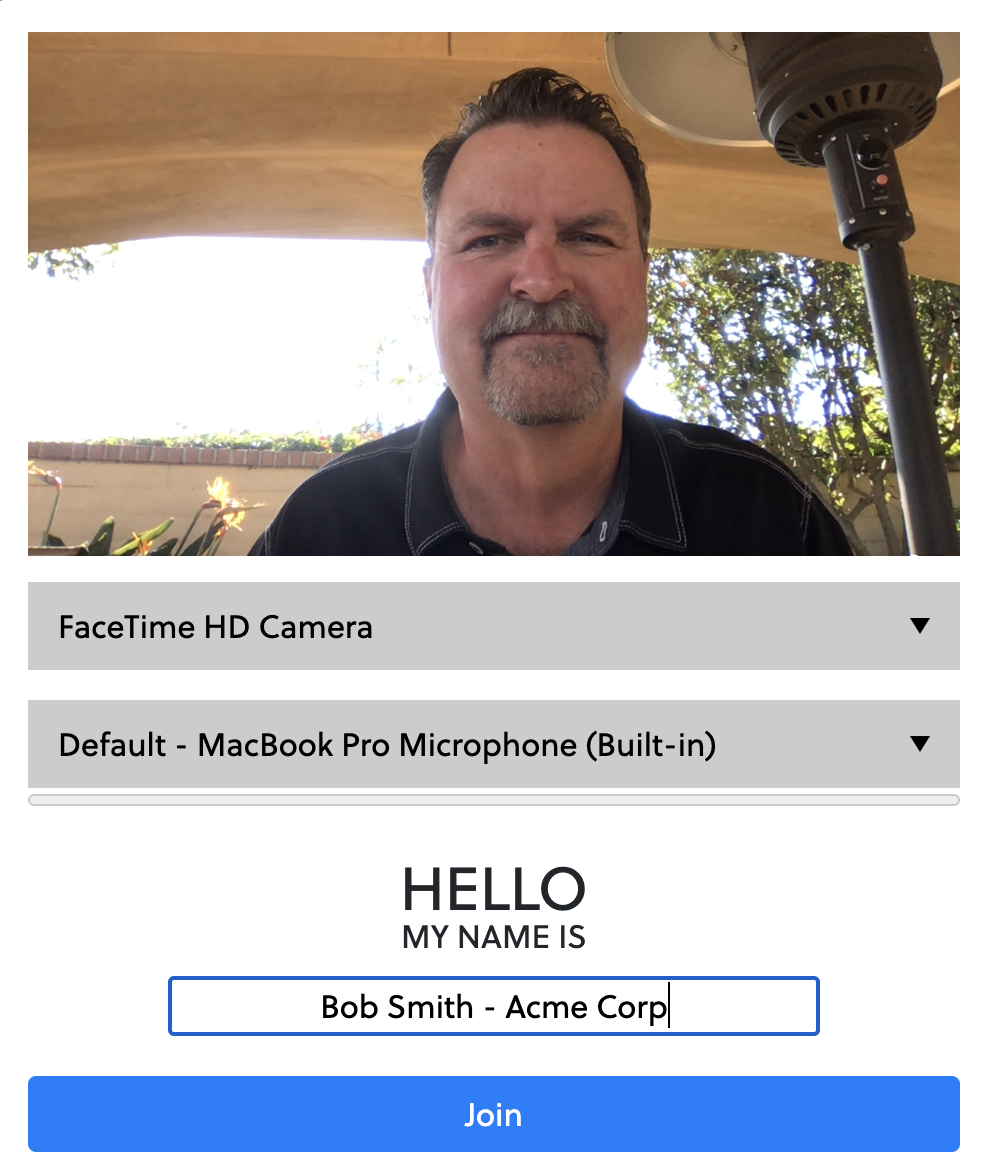
Choose your desired camera .
Choose your desired microphone.
Enter your name and company name.
Click “Join”You will be entered into the “green room”. Mike will let you into the “studio”.
If there are any issues, please call Mike at (909) 957-6877.